Headless (server to server) authentication with Dynamics CRM 2016 using Application User
| 5 min read
Working with daemon services for Dynamics CRM
I was working on a web app that requires daemon service which communicates with Dynamics CRM APIs periodically. Few months back, I figured out we can not give application permissions to Dynamics CRM API through our app. Because of the way permissions are given we could not use client credentials or client assertion certificates to acquire security token from authority. Even if we get the security token, Dynamics CRM APIs would throw 401 unauthorized error.
 ]
]
As I did not want it to be a show stopper so I continued using Resource owner password grant flow to acquire the token and then use it to consume Dynamics WebAPI. It was not the "best possible way" as it has its own limitations. One fine day, we decided to force enable MFA for all the accounts, security accounts included. This indeed was a welcome move, adding extra layer of security to all the accounts is not bad thing at all in the end. However, my app stopped working. Password grant flow does not work when you have MFA enabled on particular account.
App passwords
Microsoft has this beautiful thing called app passwords. Some clients show error when user tries to log in and their account is MFA enabled. For such scenarios Microsoft recommends us to use app passwords. Some of the scenarios are covered in this article - https://support.microsoft.com/en-in/help/12409/microsoft-account-app-passwords-two-step-verification. I was under impression that I could directly use generated app password to get authenticated using user credential but AcquireTokenAsync was throwing an exception "AADSTS70002: Error validating credentials. AADSTS50126: Invalid username or password". So it was obvious, I could not just use app password for my purpose.
Dynamics CRM Application User
Microsoft introduced "application user" concept in December 2016 patch of Dynamics CRM. The most common use case of this type of user is to let external systems or daemon services have a headless authentication with Dynamics CRM API. Application user solved long pending problem of communicating "securely" from external systems to Dynamics CRM. One of the benefits of using Application User is, you do not require a license allocation for Application Users. Some of the basic requirements for connecting application user with external systems -
- Azure AD tenant to publish Azure AD application.
- Dynamics 365 subscription
Let me walk you through the process of setting up application user in details -
Azure AD application creation -
Before we begin configuring Application User, we will need Azure AD application that will host the external system.
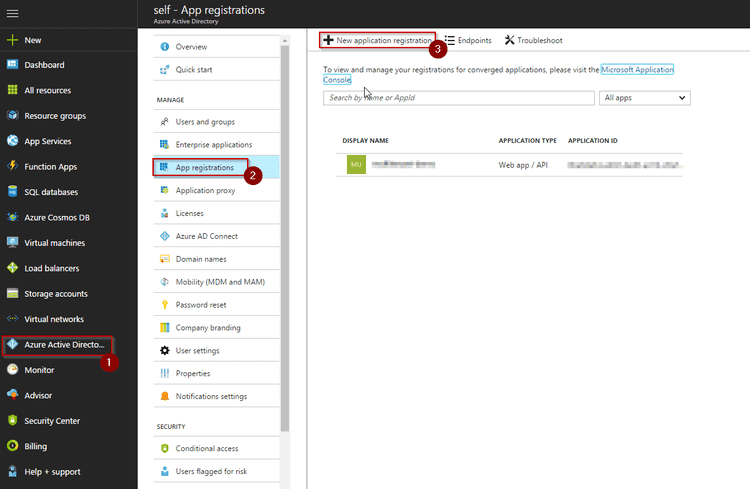
- Go to https://portal.azure.com/
- Navigate to Windows Active Directory - App registrations - + New application registration
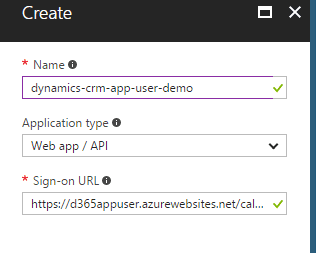
- Enter Application Name, Set type as Web app / API and a valid sign-on URL.
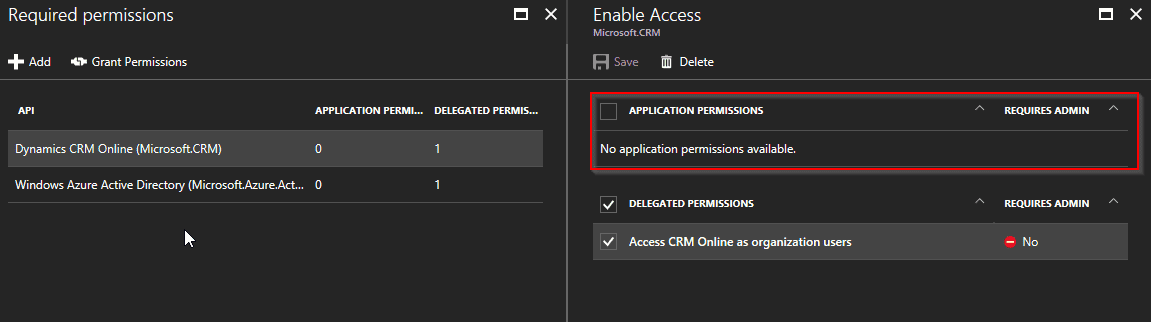
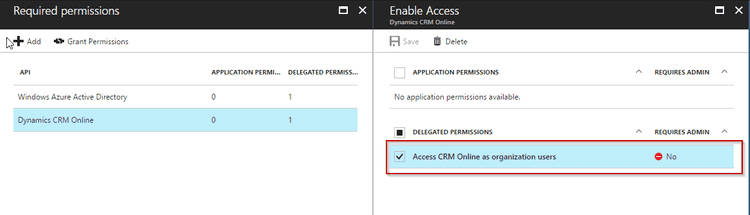
- Add Dynamics CRM Online in required permissions and set the configuration as given in picture below -
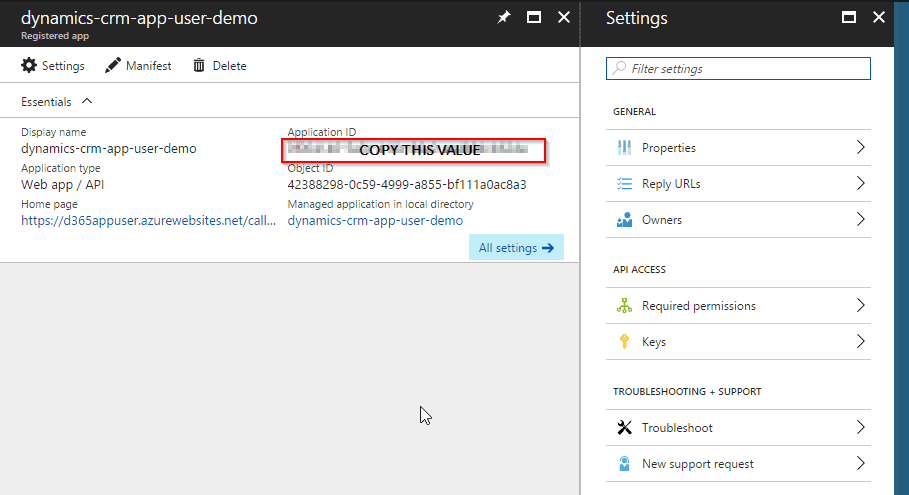
- Copy Application ID and note it somewhere. You will need it while setting up application user.
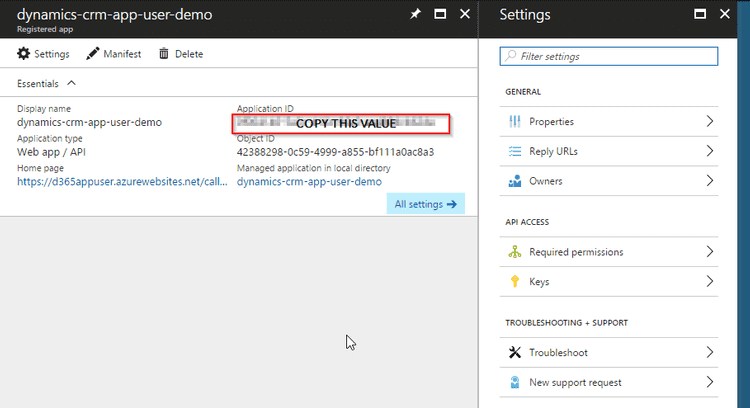


That's it for creating Azure AD application. Now let's move on to creating application user -
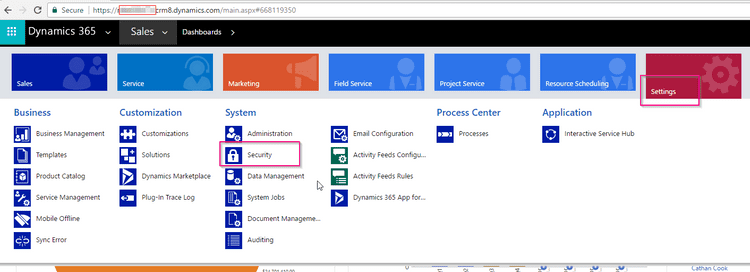
Creating Application User in Dynamics CRM portal
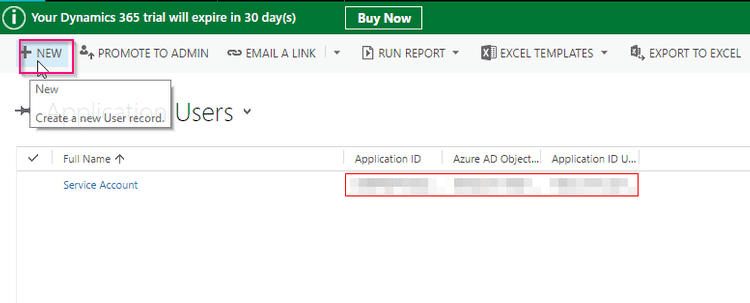
- Go to Dynamics Settings -> Security -> Users
 Click on Add New User
 - Select **Application Users **view
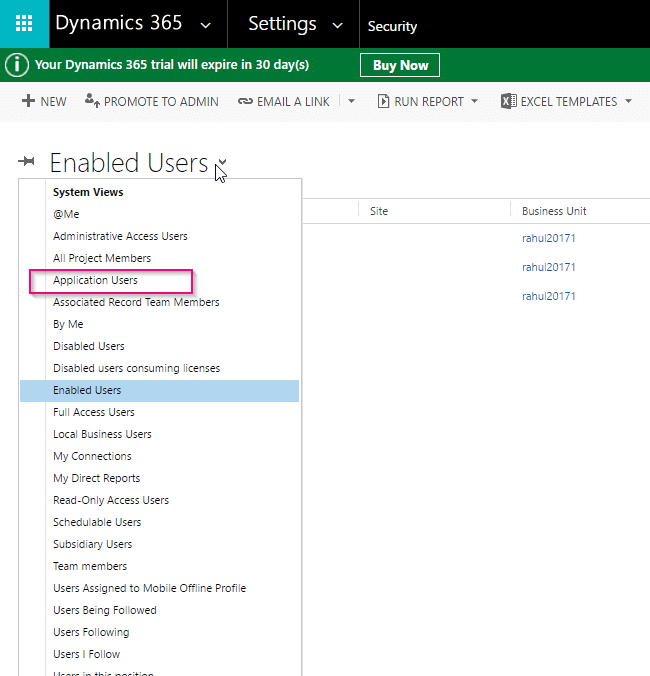
- Click on Add New User and select Application User from dropdown (*IMPORTANT).
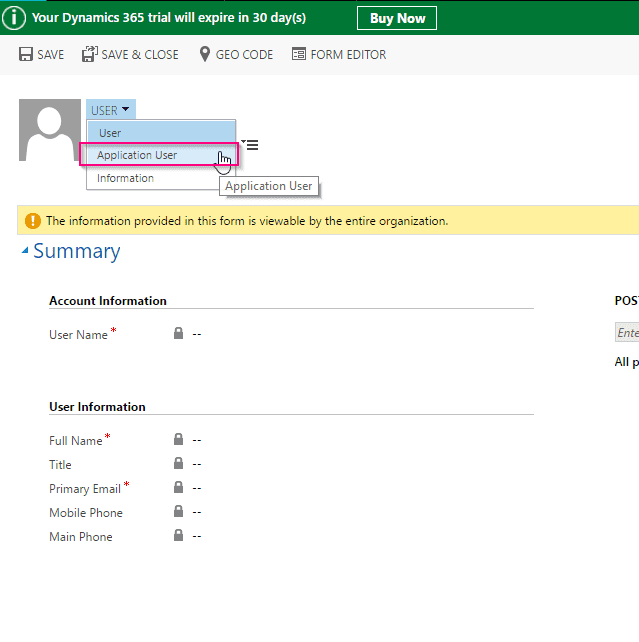
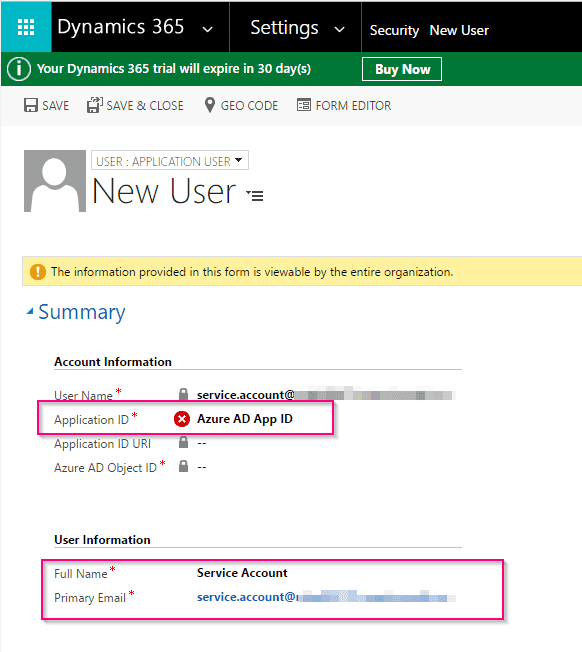
- Enter Azure AD ID (we copied in earlier steps, Full name and email address of the account.


Creating and assigning a custom security role to app user
Application User needs basic sets of permissions assigned to it. For that, you need to create a custom role for application user. Because of the way application user is designed, you need to assign a custom role to the application user. Existing Dynamics roles will not work with application user. Follow these steps to create custom roles -
- Go to Dynamics CRM -> Settings -> Security -> Security roles.
- Click New to add new security role.
- Give the required permissions and save the role.
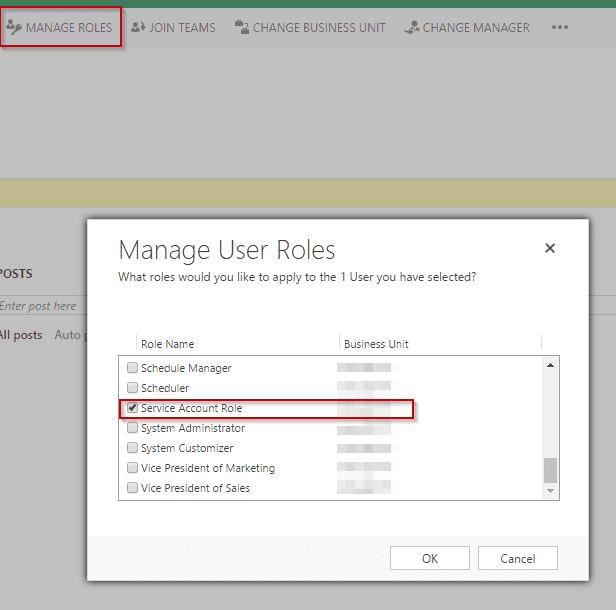
Once you create a custom role, you now need to assign custom role to application user.
- Go to user profile -> Click Manage Roles and assign the newly created role to user

Ok, everything looks in place now. Just one more thing remaining. If you are working on a multi-tenant application, make sure you log in as an admin when you run this app / service first time. You need to grant the access to Azure AD app so that it gets added to your tenant enterprise app registry.
Considering you've followed the steps correctly, you can now use Client Credentials (for multi-tenant) or even safer Client Assertion Certification (for single tenant) to fetch access token. Which you can use to communicate with Dynamics CRM Web API.
Here is a sample code that demonstrate authentication and calling Dynamics WebAPI. Just a reminder, this is a very rough sample code I picked from my console POC app. There are many many ways to write it in better.
| /// <summary> | |
| /// Headless communication to dynamics CRM using application user. | |
| /// More information at : http://www.wrapcode.com/server-authentication-dynamics-crm/ | |
| /// This is just a sample code, there are way better ways to achieve the same. Did not want to spend much time on code snippet. | |
| /// </summary> | |
| public static async Task HeadlessAuthenticationPOC() | |
| { | |
| var clientCreds = new ClientCredential("{AZURE_AD_APP_ID}", "{AZURE_AD_APP_SECRET}"); | |
| AuthenticationResult authResult = null; | |
| // Call sample API | |
| try | |
| { | |
| authResult = await authContext.AcquireTokenAsync("https://{{TENANT}}.crm4.dynamics.com", clientCreds); | |
| // Add the access token to the authorization header of the request. | |
| if(authResult == null) | |
| return; | |
| httpClient.DefaultRequestHeaders.Authorization = new AuthenticationHeaderValue("Bearer", authResult.AccessToken); | |
| HttpResponseMessage response = await httpClient.GetAsync("https://{{TENANT}}.crm4.dynamics.com/api/data/v8.1/contacts?$top=1"); | |
| if (response.IsSuccessStatusCode) | |
| { | |
| // Read the response and output it to the console. | |
| string s = await response.Content.ReadAsStringAsync(); | |
| } | |
| else | |
| { | |
| Console.WriteLine("Failed to retrieve contact \nError: {0}\n", response.ReasonPhrase); | |
| } | |
| } | |
| catch (Exception ex) | |
| { | |
| _logger.Fatal(ex); | |
| } | |
| } |
Hope this helped you. Happy DevOpping,
Rahul